Difference between revisions of "Activities"
| Line 507: | Line 507: | ||
The higher your fishing mastery is, the higher the HPs of your Line will be. | The higher your fishing mastery is, the higher the HPs of your Line will be. | ||
| − | + | <div class="center-item"> | |
'''''But... How do you fish ?''''' | '''''But... How do you fish ?''''' | ||
| + | </div> | ||
That's simple ! You will need to pay attention to your character's emotes of course ! | That's simple ! You will need to pay attention to your character's emotes of course ! | ||
Revision as of 06:59, 26 December 2021
Introduction
Activities are abilities relating to specific tasks in which a character can progress as they practice. These activities are diverse and the benefits they offer too.
You will need zenys in order to Skill up your Activity Skill to the NPC, but you will also need to invest time and effort by taking down mines you can find on fields & dungeons.
These activities are account bound, meaning if you take part to the Mining Activity with your first character, the second one on the same account will be able to farm mines too, with the same progression line regarding the experience earned.
You are not limited to one activity, you can be a miner, a fisher & a brewer at the same time !
- You can use some commands to get more informations about your progression :
- @fishing
- @cooking
- @learning
- @brewing
- @mining
- @hunting
- You can use some commands to get more informations about your progression :
Usually, you can also use the corresponding Skill in order to perform the corresponding Activity.
Activities Experience Table
| EXP required | Requirements | |
|---|---|---|
| Lvl 0~1 | None | 50 000 zenys |
| Lvl 1~2 | 1 000 XP | 50 000 zenys |
| Lvl 2~3 | 4 000 XP | 100 000 zenys |
| Lvl 3~4 | 9 000 XP | 500 000 zenys |
| Lvl 4~5 | 16 000 XP | 850 000 zenys |
| Lvl 5~6 | 25 000 XP | 1 300 000 zenys |
| Lvl 6~7 | 36 000 XP | 1 850 000 zenys |
| Lvl 7~8 | 49 000 XP | 2 500 000 zenys |
| Lvl 8~9 | 64 000 XP | 3 250 000 zenys |
| Lvl 9~10 | 81 000 XP | 4 100 000 zenys |
Tool refiner pour refine l'accessoire, +10 max
NPC qui te propose de le refine
coût pour le refine : .@cost = .@new_refine * .@new_refine * 50000;
Accessoire lié à l'activité
Items requis pour refine l'accessoire :
// 2/4/6/8/10/0/0/0/0/0 Phracon(s), 0/0/0/0/0/6/8/10/12/14 Emveretarcon(s)
   .@recipe[1] = .@new_refine <= 5 ? 1010 : 1011;
   .@recipe[2] = .@new_refine <= 5 ? .@new_refine * 2 : (.@new_refine - 3) * 2;
   // 1/2/3/4/5/6/7/8/9/10 Iron(s)
   .@recipe[3] = 998;
   .@recipe[4] = .@new_refine;
// Special Materials
   switch(.@new_refine) {
       case 1: .@recipe[5] = 7041; .@recipe[6] = 40; break; // Fine Grit (7041)
       case 2: .@recipe[5] = 1056; .@recipe[6] = 20; break; // Grit (1056)
       case 3: .@recipe[5] = 7054; .@recipe[6] = 20; break; // Brigan (7054)
       case 4: .@recipe[5] = 7758; .@recipe[6] = 20; break; // Star Crystal (7758)
       case 5: .@recipe[5] = 7232; .@recipe[6] = 20; break; // Silver Ore (7232)
       case 6: .@recipe[5] = 969; .@recipe[6] = 2; break; // Gold (969)
       case 7: .@recipe[5] = 724; .@recipe[6] = 2; break; // Cursed Ruby (724)
       case 8: .@recipe[5] = 25271; .@recipe[6] = 5; break; // Illusion Stone (25271)
       case 9: .@recipe[5] = 25271; .@recipe[6] = 10; break; // Illusion Stone (25271)
       case 10:
           .@recipe[5] = 25271; .@recipe[6] = 15;
           .@recipe[7] = 6024; .@recipe[8] = 2;
           break; // 17 Carat Diamond (6024)
   }
maitrise = SKILLLV x SKILLLV + 5 * refine acc
Tools
| Fishing Tool | |
|---|---|
 |
Increase appearance of rare drops while Fishing by ALERT MISSING INFOS |
| Hunting Tool | |
|---|---|
 |
Increase appearance of rare drops while Hunting by ALERT MISSING INFOS |
| Cooking Tool | |
|---|---|
 |
Increase appearance of rare drops while Cooking by ALERT MISSING INFOS |
| Brewing Tool | |
|---|---|
 |
Increase appearance of rare drops while Brewing by ALERT MISSING INFOS |
| Learning Tool | |
|---|---|
 |
Increase appearance of rare drops while Learning by ALERT MISSING INFOS |
| Mining Tool | |
|---|---|
 |
Increase appearance of rare drops while Mining by ALERT MISSING INFOS |
Activities
 Fishing
In order to be able to fish, you will need to be in the water and you will need one of the five existing Baits.
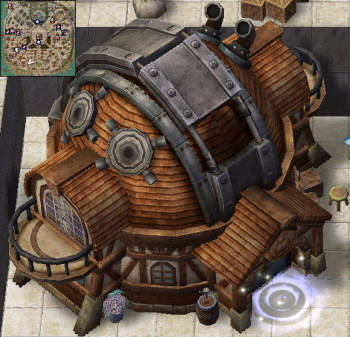
- You can get them by talking to the NPC in the Fishing House in Midgard.
- This house is located at Midgard, west side of the donations' fountain at south.
- You can get them by talking to the NPC in the Fishing House in Midgard.
- You can fish during day and night, however, at night, fishing is easier but fishing time is doubled.
  By trading fishes for Fishing Points, you will be allowed to purchase items into the Shop.
  Read below to check the shop content.
Baits
| Types of Baits | ||||||||
|---|---|---|---|---|---|---|---|---|
| ID | Name | Success Rate Bonus | ID | Name | Success Rate Bonus | |||
 |
6781 | Living Earthworm | 0% |  |
6782 | Fresh Lobster | 10% | |
 |
6778 | Squid | 20% |  |
6903 | King Earthworm | 30% | |
 |
6902 | King Shrimp | 40% | |||||
All types of Fishes
| List of Fishes giving Fishing Points | ||||||||||||
|---|---|---|---|---|---|---|---|---|---|---|---|---|
| ID | Name | Health Points | Points | ID | Name | Health Points | Points | |||||
| Day | Night | Day | Night | |||||||||
 |
6779 | Mackerel | 7 500 | 6 750 | 2 |  |
6776 | Eel | 7 500 | 6 750 | 3 | |
 |
6774 | Piranha | 7 500 | 6 750 | 4 |  |
6772 | Octopus | 10 000 | 9 000 | 5 | |
 |
6096 | Fish with Blue Back | 12 500 | 11 250 | 6 |  |
6770 | Shark | 15 000 | 13 500 | 8 | |
 |
6899 | Giant Octopus | 17 500 | 15 750 | 12 |  |
6900 | Giant Squid | 10 000 | 9 000 | 12 | |
 |
6898 | Whale | 35 000 | 31 500 | 20 |  |
6897 | Blue Whale | 50 000 | 45 000 | 40 | |
| List of Fishes with their effects | ||||||||||||
|---|---|---|---|---|---|---|---|---|---|---|---|---|
| ID | Name | Health Points | Effects | ID | Name | Health Points | Effects | |||||
| Day | Night | Day | Night | |||||||||
 |
8100 | Blue Fish | 10 000 | 9 000 |
|
 |
8101 | Marlin | 8 000 | 7 200 |
| |
 |
8102 | Catfish | 12 000 | 10 800 |
|
 |
8103 | Sturgeon | 12 500 | 11 250 |
| |
 |
8104 | Golden Fish | 13 300 | 11 970 |
|
 |
8105 | Salmon | 15 000 | 13 500 |
| |
 |
8106 | Perch | 7 500 | 6 750 |
|
 |
8107 | Riversquire | 6 600 | 5 940 |
| |
 |
8108 | Tuna | 12 500 | 11 250 |
|
 |
8109 | Carp | 10 000 | 9 000 |
| |
A revoir v2
- En fonction de la région la liste des fish est différentes, voir la liste ci dessous Par example les maps prt_, donc de prontera, peuvent avoir les fish 8101, 8103, 8105, 8107, 8109. De plus dans ces régions les poissons ont un modificateur de +10% en <toughness> et <speed> ainsi que -10% en <strength> et <vigilance> (je détails ces stats plus bas)
- Aussi en fonction de son numéro la map a plus ou moins de chances d'avoir un "sized" fish (qui a un bonus donc) plutôt qu'un "none sized" fish (qui vaut des points)
- Un poisson sized peut donc être petit, moyen ou gros (d'ailleurs on associe )
- Le poisson est gros a 0% (+ Maitrise * 0.15) (stats +50%) (niveau 8)
- Le poisson est moyen a 20% (+ Maitrise * 0.2) (stats normales) (niveau 5)
- Sinon il sera petit (stats -25%) (niveau 2)
Fights System
Each time you fish, your Fishing Line has Health Points, and so it goes for all fishes as well. The higher your fishing mastery is, the higher the HPs of your Line will be.
But... How do you fish ?
That's simple ! You will need to pay attention to your character's emotes of course ! By typing @fishing or by casting the Fishing Skill while having your feet in an area full of water, your character will start to fish. The character will be forcibly sat and after a while, you will see an emote above the head of the character.
- Two emotes can be seen while fishing :
- The first one, a
 thinking face will be showned, meaning there is a chance to catch the fish.
 - The second one is the
 surprise emote. If this emote is showned, it means the fish is cautious and that it's not the good time for you to try to catch it.
- The first one, a
- Two emotes can be seen while fishing :
What you need to do is to stand up at the right time. You need to wait the thinking emote's disappearance but if the surprise's emote appears, it's already too late ! To stand up, you can press Inser key on your keyboard or just type /sit in your chat.
  If you succeed, the fish will take damage equal to half of your fishing mastery.

  If you failed, your fishing line will take damage equal to half of its toughness. Check the fish list in order to check all fishes' toughness.
You will need to repeat the maneuvers as long as your line or the fish's HPs have not hit rock bottom.
- If you catch it, there is :
- 40 + Fishing Level x 0.2% chance to obtain the fish you fought against
- If the previous formula isn't a success, you will have a second chance to get the same type of fish than the one you fought against, but in smaller size.
- Take note that if you loose despite these tries, you will receive a Rotten Fish. This one can be exchanged for 1 Fishing Point or just dismantled to get Foods for your QPets !
- If you catch it, there is :
You will earn Fishing Experience even if you fail your catch.
  Upon a successful try, you will be granted with 10 x Fish Level Experience Points.
  Else, you will receive 3 x Fish Level Experience Points.
You can check the level of the Fish in the table overhead.
 Cooking
  Each level of Cooking learned unlock one Food level that can be crafted.
  If you master Cooking Level 10, you will be able to craft usual Level 10 Food or Foods that do not disappear upon death.
Cooking Kits
| ID | Name | Success Rate bonus | ID | Name | Success Rate bonus | |||
|---|---|---|---|---|---|---|---|---|
 |
12125 | Outdoor Cooking Kit | 0% |  |
12126 | Home Cooking Kit | 10% | |
 |
12127 | Professional Cooking Kit | 20% |  |
12128 | Royal Cooking Kit | 30% | |
 |
12129 | Fantastic Cooking Kit | 100% | |||||
Success Rates
| Cooking formulas | |
|---|---|
| Chances to get one Food | [(40 + CookingActivityLevel * 0.5) - (5 * FoodLevel)]%
|
| Chances to get a second Food | [(40 + CookingActivityLevel * 0.5) - (5 * FoodLevel)]% / 3
|
| Chances to get a third Food | [(40 + CookingActivityLevel * 0.5) - (5 * FoodLevel)]% / 5
|
Take note that if you handle the corresponding Cookbook in your inventory, the casting time of the Cooking Skill is drastically reduced.
Rewards
- Each cooking success will grant the player by 50 experience point per ActivityLevel learned.
- Upon a cooking failure, you will only be granted by a third of this amount of experience.
- Each cooking success will grant the player by 50 experience point per ActivityLevel learned.
- Comme pour toutes les activités la "maitrise" est égale à niveau du skill x niveau du skill (donc 1/4/9/16/25/36/49/64/81/100)
 Learning
The Learning activity is used in order to increase experience points earned.
- By talking to some Posts NPC, you will start "learning".
The first NPC you can talk with is situated in Karakass Town, precisely at kar_bib,173,111.
How it works ?
- When you talk to any of these NPC located in almost all libraries, you will have to choose between two different studies.
- The first one requires to stay in the area. You won't be allowed to change map to accumulate knowledges. Whenever you want, talk to the NPC to end your study. Each study have a maximum duration of 20 minutes.
- If you studied for 20 minutes, you will receive 50% more experience points upon monsters' kills as long as you don't reach the amount of experience points listed in the table below.
- The first one requires to stay in the area. You won't be allowed to change map to accumulate knowledges. Whenever you want, talk to the NPC to end your study. Each study have a maximum duration of 20 minutes.
| Learning Experience Pool | |
|---|---|
| Time spent studying | Amount of Experience points doubled |
The amount of Learning Experience points earned is equal to the time spent to learn in minutes. Meaning that if you studied for 20 minutes, you will be granted by 20 Learning Experience points.
- L'xp reçue est la même que pour un repos en INN en étant déconnecté X minutes, x étant ici un % du temps passé en étude (studying for 1 minute is equal to (5 + Level library) minutes disconnected as resting bonus)
- La Maitrise augmente en % le temps validé pour l'étude, par example si on a passé 900 secondes d'étude niveau 5 et une maitrise de 100 alors il a (900/60)*10=150min+100% = 300min de déconnection
- The second type of studies allow you to learn more about a specific monster.
- By accumulate knowledges about a monster, you will get more damage and resistance to this monster's ID. These bonus are equal to your Activity Level in percent. Meaning a Learning Level 10 Skill grants 10% damage and 10% resistance against while facing the corresponding monster. Any study concerning a monster takes 30 seconds. After that, the bonus will be applied for an unlimited amount of time.
- If you want to start another study, the previous bonus will be erased.
- The second type of studies allow you to learn more about a specific monster.
Regardless of the type of studies you do, if you log out or change map, the current study will be cancelled.
The player can't learn more than 20 minutes each day. This cap is reset at midnight, please use @time to check current server time.
- The experience points' pool generated by this system may be complicated. If you want more infos, please check the explanations below :
- If you studied enough to accumulate 11 500 boosted EXP and you kill a monster giving 400 Exp points, you will receive 600 Exp (400 +50%) and your Learning Pool will be reduced by 200. Your new pool will reach 11 300.
- The experience points' pool generated by this system may be complicated. If you want more infos, please check the explanations below :
You cannot have several pool at a time. If you already have any and that you start another study, only the biggest pool will be conserved.
 Brewing
- Brews are sorted in 3 categories : Mixtures, Solutions & Infusions.
- Each level of Brewing will unlock one recipe of each category.
- Brews are sorted in 3 categories : Mixtures, Solutions & Infusions.
Brewing Kits
| ID | Name | Success Rate bonus | ID | Name | Success Rate bonus | |||
|---|---|---|---|---|---|---|---|---|
 |
8191 | Outdoor Brewing Kit | 0% |  |
8192 | Home Brewing Kit | 10% | |
 |
8193 | Professional Brewing Kit | 20% |  |
8194 | Royal Brewing Kit | 30% | |
 |
8195 | Fantastic Brewing Kit | 100% | |||||
Success Rates
| Brewing formulas | |
|---|---|
| Chances to get one Brew | [(40 + BrewingActivityLevel * 0.2)%
|
| Chances to get a second Brew | [(40 + BrewingActivityLevel * 0.2)% / 3] - 10%
|
| Chances to get a third Brew | [(40 + BrewingActivityLevel * 0.5)% / 5] - 20%
|
Mixtures
| ID | Name | Effects | Materials | Mixture Level | |
|---|---|---|---|---|---|
 |
8130 | Apple Mixture |
|
|
1 |
 |
8131 | Banana Mixture |
|
|
2 |
 |
8132 | Bloody Mixture |
|
|
3 |
 |
8133 | Carrot Mixture |
|
|
4 |
 |
8134 | Choco Mixture |
|
|
5 |
 |
8135 | Grape Mixture |
|
|
6 |
 |
8136 | Tonic Mixture |
|
|
7 |
 |
8137 | Mastela Mixture |
|
|
8 |
 |
8138 | Mora Mixture |
|
|
9 |
 |
8139 | Ale Mixture |
|
|
10 |
Solutions
| ID | Name | Effects | Materials | Solution Level | |
|---|---|---|---|---|---|
 |
8140 | Ocean Solution |
|
|
1 |
 |
8141 | Golden Solution |
|
|
2 |
 |
8142 | Azur Solution |
|
|
3 |
 |
8143 | Brown Solution |
|
|
4 |
 |
8144 | Scarlet Solution |
|
|
5 |
 |
8145 | Miracle Solution |
|
|
6 |
 |
8146 | Mana Solution |
|
|
7 |
 |
8147 | Mega Solution |
|
|
8 |
 |
8148 | Blue Solution |
|
|
9 |
 |
8149 | Red Solution |
|
|
10 |
Infusions
| ID | Name | Effects | Materials | Solution Level | |
|---|---|---|---|---|---|
 |
8170 | Green Infusion |
|
|
1 |
 |
8171 | Red Infusion |
|
|
2 |
 |
8172 | Blue Infusion |
|
|
3 |
 |
8173 | Yellow Infusion |
|
|
4 |
 |
8174 | Brown Infusion |
|
|
5 |
 |
8175 | Bloody Infusion |
|
|
6 |
 |
8176 | Golden Infusion |
|
|
7 |
 |
8177 | Silver Infusion |
|
|
8 |
 |
8178 | Violet Infusion |
|
|
9 |
 |
8179 | White Infusion |
|
|
10 |
 Mining
You can mine as long as you learnt the Mining skill at level 1 or higher. It's like a passiv skill and you will be able to collect items and mining experience upon killing a mine.
- Mines are located on fields or dungeons and are very weak, you just need to defeat them to get the rewards.
Check the list below in order to know which mine you may want to hunt !
  Upon a kill, you will get Mining Experience according to this formula : Mining Level OR Mine Level x 50.
  The lowest value will be used to calculate the points granted.
Lvl 1 Mines
| Mine Lvl | Name | |
|---|---|---|
| 1 | Coal Mine | |
| Common Drops | Rare Drops | |
|
| |
| Mine Lvl | Name | |
| 1 | Stone Mine | |
| Common Drops | Rare Drops | |
|
| |
Lvl 2 Mines
| Mine Lvl | Name | |
|---|---|---|
| 2 | Iron Mine | |
| Common Drops | Rare Drops | |
|
| |
| Mine Lvl | Name | |
| 2 | Phracon Mine | |
| Common Drops | Rare Drops | |
|
| |
Lvl 3 Mines
| Mine Lvl | Name | |
|---|---|---|
| 3 | Elemental Mine | |
| Common Drops | Rare Drops | |
|
| |
| Mine Lvl | Name | |
| 3 | Emvertacon Mine | |
| Common Drops | Rare Drops | |
|
| |
| Mine Lvl | Name | |
| 3 | Brigan Mine | |
| Common Drops | Rare Drops | |
|
| |
Lvl 4 Mines
| Mine Lvl | Name | |
|---|---|---|
| 4 | Ruby Mine | |
| Common Drops | Rare Drops | |
|
|
|
| Mine Lvl | Name | |
| 4 | Sapphire Mine | |
| Common Drops | Rare Drops | |
|
|
|
| Mine Lvl | Name | |
| 4 | Emerald Mine | |
| Common Drops | Rare Drops | |
|
|
|
| Mine Lvl | Name | |
| 4 | Topaz Mine | |
| Common Drops | Rare Drops | |
|
|
|
| Mine Lvl | Name | |
| 4 | Star Mine | |
| Common Drops | Rare Drops | |
|
|
|
Lvl 5 Mines
| Mine Lvl | Name | |
|---|---|---|
| 5 | Mystic Mine | |
| Common Drops | Rare Drops | |
|
| |
| Mine Lvl | Name | |
| 5 | Crystal Mine | |
| Common Drops | Rare Drops | |
|
| |
| Mine Lvl | Name | |
| 5 | Silver Mine | |
| Common Drops | Rare Drops | |
|
| |
| Mine Lvl | Name | |
| 5 | Shining Mine | |
| Common Drops | Rare Drops | |
|
| |
Lvl 6 Mines
| Mine Lvl | Name | |
|---|---|---|
| 6 | Oridecon Mine | |
| Common Drops | Rare Drops | |
|
| |
| Mine Lvl | Name | |
| 6 | Elunium Mine | |
| Common Drops | Rare Drops | |
|
| |
| Mine Lvl | Name | |
| 6 | Gold Mine | |
| Common Drops | Rare Drops | |
|
| |
| Mine Lvl | Name | |
| 6 | Pyroxene Mine | |
| Common Drops | Rare Drops | |
|
| |
Lvl 7 Mines
| Mine Lvl | Name | |
|---|---|---|
| 7 | Emperium Mine | |
| Common Drops | Rare Drops | |
|
| |
| Mine Lvl | Name | |
| 7 | Gem Mine | |
| Common Drops | Rare Drops | |
|
| |
| Mine Lvl | Name | |
| 7 | Darkness Mine | |
| Common Drops | Rare Drops | |
|
| |
| Mine Lvl | Name | |
| 7 | Biotite Mine | |
| Common Drops | Rare Drops | |
|
| |
| Mine Lvl | Name | |
| 7 | Muscovite Mine | |
| Common Drops | Rare Drops | |
|
| |
| Mine Lvl | Name | |
| 7 | Phlogopite Mine | |
| Common Drops | Rare Drops | |
|
| |
Lvl 8 Mines
| Mine Lvl | Name | |
|---|---|---|
| 8 | Bradium Mine | |
| Common Drops | Rare Drops | |
|
|
|
| Mine Lvl | Name | |
| 8 | Carnium Mine | |
| Common Drops | Rare Drops | |
|
|
|
| Mine Lvl | Name | |
| 8 | Illusion Mine | |
| Common Drops | Rare Drops | |
|
|
|
| Mine Lvl | Name | |
| 8 | Quartz Mine | |
| Common Drops | Rare Drops | |
|
|
|
Lvl 9 Mines
| Mine Lvl | Name | |
|---|---|---|
| 9 | Rich Oridecon Mine | |
| Common Drops | Rare Drops | |
|
| |
| Mine Lvl | Name | |
| 9 | Rich Elunium Mine | |
| Common Drops | Rare Drops | |
|
| |
| Mine Lvl | Name | |
| 9 | Rainbow Mine | |
| Common Drops | Rare Drops | |
|
| |
Lvl 10 Mines
| Mine Lvl | Name | |
|---|---|---|
| 10 | Rich Bradium Mine | |
| Common Drops | Rare Drops | |
|
| |
| Mine Lvl | Name | |
| 10 | Rich Carnium Mine | |
| Common Drops | Rare Drops | |
|
| |
Lvl 11 Mines
| Mine Lvl | Name | |
|---|---|---|
| 11 | Mithril Mine | |
| Common Drops | Rare Drops | |
|
| |
| Mine Lvl | Name | |
| 11 | Muspellium Mine | |
| Common Drops | Rare Drops | |
|
| |
Lvl 12 Mines
| Mine Lvl | Name | |
|---|---|---|
| 12 | Orichalcum Mine | |
| Common Drops | Rare Drops | |
 Hunting
Each day, any player can take part to this activity 3 times per day. When you type @hunting or at the moment you use the Hunting skill, you will have to choose a level treshold concerning your future target.
| Hunting | ||
|---|---|---|
| Hunting Level | Level Treshold | Number of kills required |
| 1 | 0~10 | 32 |
| 2 | 11~20 | 34 |
| 3 | 21~30 | 36 |
| 4 | 31~40 | 38 |
| 5 | 41~50 | 40 |
| 6 | 51~60 | 42 |
| 7 | 61~70 | 44 |
| 8 | 71~80 | 46 |
| 9 | 81~90 | 48 |
| 10 | 91~100 | 50 |
  The level treshold used is a specific level that isn't always the same than the one you can see by typing @mi.
  This system guarantees a level closer to the monster's real power.
You can reset the chosen target 3 times per day in order to be granted with another target.
- If any team member kill a monster on the same map than the one you are on, it will count for your Hunting quest.
Daily reset occurs at midnight, use @time to check the current server time.
- Upon quest's completion, you can use Hunting skill again no matter the area you are in, in order to give back the quest and receive the Hunting Points and Hunting Experience points you deserve.
- Hunting Points granted are equal to (Mastery / 10 + 5 + Level of the Hunt x Level of the Hunt).
- Hunting Experience points granted are equal to 100 x Level of the Hunt.
- Upon quest's completion, you can use Hunting skill again no matter the area you are in, in order to give back the quest and receive the Hunting Points and Hunting Experience points you deserve.
You need to equip the Hunting Tool when you pick the quest and when you give it back in order to receive the maximum amount of Hunting Points.
- In Midgard's south-west district near the market, you can meet the Hunting Shop handler, he will gladly exchange your Hunting Points versus any reward of the list below.