
 Activities, dungeons & events
This guide comes from the old wiki and is being reviewed; some details may be out of date. The Codex always shows the current game data.
Introduction
Activities are new skills relating to specific tasks a character can improve as they practice. The activities are as diverse as the benefits they offer.
- You will need zenys in order to Skill up your Activity Skill to the NPC, but you will also need to invest time and effort. E. g. by mining ores you can find on fields & dungeons, catching fish in water areas, etc.
- These activities are account bound; if you invest in the Mining Activity with your first character, any other character one on the same account will be able to farm mines as well, with the same progression line regarding the experience earned.
  You are not limited to one activity, you can be a miner, a fisher & a brewer at the same time!
  Usually, you can also use the corresponding Skill in order to perform the corresponding Activity.
- You can use some commands to get more informations about your progression:
- @fishing / @cooking / @learning / @brewing / @mining / @hunting
Activities Experience Table
| Activity Level | EXP required | Requirements |
|---|---|---|
| Lvl 0~1 | None | 50 000 zenys |
| Lvl 1~2 | 1 000 XP | 100 000 zenys |
| Lvl 2~3 | 4 000 XP | 250 000 zenys |
| Lvl 3~4 | 9 000 XP | 500 000 zenys |
| Lvl 4~5 | 16 000 XP | 850 000 zenys |
| Lvl 5~6 | 25 000 XP | 1 300 000 zenys |
| Lvl 6~7 | 36 000 XP | 1 850 000 zenys |
| Lvl 7~8 | 49 000 XP | 2 500 000 zenys |
| Lvl 8~9 | 64 000 XP | 3 250 000 zenys |
| Lvl 9~10 | 81 000 XP | 4 100 000 zenys |
| Lvl 10~11 | 100 000 XP | 5 050 000 zenys |
| Lvl 11~12 | 121 000 XP | 6 100 000 zenys |
| Lvl 12~13 | 144 000 XP | 7 250 000 zenys |
| Lvl 13~14 | 169 000 XP | 8 500 000 zenys |
| Lvl 14~15 | 196 000 XP | 9 850 000 zenys |
| Lvl 15~16 | 225 000 XP | 11 300 000 zenys |
| Lvl 16~17 | 256 000 XP | 12 850 000 zenys |
| Lvl 17~18 | 289 000 XP | 14 500 000 zenys |
| Lvl 18~19 | 324 000 XP | 16 250 000 zenys |
| Lvl 19~20 | 361 000 XP | 18 100 000 zenys |
Your Mastery won't be increased as much on level 11~20 than on level 1~10. It is a gradual increase.
What is an Activity Tools?
| Tool | Effect | |
|---|---|---|
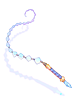 |
Fishing Tool | Increase appearance of rare fishs while fishing. |
 |
Brewing Tool | Increase success rate while crafting. |
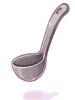 |
Cooking Tool | Increase success rate while crafting. |
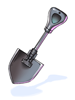 |
Mining Tool | Increase appearance of rare drops while mining. |
 |
Learning Tool | Increase amount of bonus experience available thanks to the learning. |
 |
Hunting Tool | Increase Hunting Points obtained upon hunts and reduce amount of required kills. |
How to get an Activity Tools ?
Activities Tools are sold in the Mammonith Bank building located east of Midgard's center.
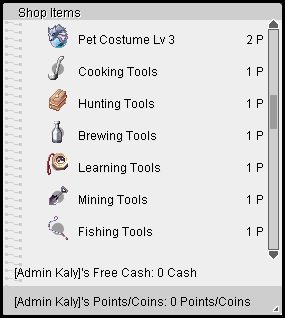
- Each Tools costs 1 Silver Coin and you can buy it thanks to the Silver Coins Shop NPC.
- Note: you can convert Bronze Coins into Silver Coins.
- To give a Tool to your other characters, equip it and ask the matching Activity Master (Fishing Master, Cooking Master, etc.) to Duplicate Activity Tool. It costs 5 Bronze Coins and the copy is bound to your account.
How to refine my Tools?
- Following the table below, you will be able to refine your tools in order to increase the rewards given by all Activities as mentioned above.
- The corresponding NPC is located Midgard South-East, near the Midgard Police Department.
- The Tools Refiner will ask you for zenys and an equipped Tool to refine.
- Tools are unbreakable for the purpose of refinement.
- Besides zenys, each refinement also requires materials (the Tools Refiner lists them before you confirm). The maximum refine level is +10.
While refining your Tools, please take care of having only one equipped in Alt + Q panel at the same time.
| Tools refining | ||
|---|---|---|
| Tool RefineLevel | Reward | Price |
| 0~1 | +1 Activity Tools | 50.000z |
| 1~2 | +2 Activity Tools | 200.000z |
| 2~3 | +3 Activity Tools | 450.000z |
| 3~4 | +4 Activity Tools | 800.000z |
| 4~5 | +5 Activity Tools | 1.250.000z |
| 5~6 | +6 Activity Tools | 1.800.000z |
| 6~7 | +7 Activity Tools | 2.450.000z |
| 7~8 | +8 Activity Tools | 3.200.000z |
| 8~9 | +9 Activity Tools | 4.050.000z |
| 9~10 | +10 Activity Tools | 5.000.000z |
  The "Mastery" mentionned in some formulas and explanations is calculated from your Activity Level and your Tool:
  Base = 10 x ActivityLevel (above level 10, each extra level only adds 5 instead of 10)
  Mastery = Base + Base x (2% x ToolRefine) + 3 x ToolRefine
  Use @fishing, @mining, etc. to check your current Mastery.
Activities
Jump to: Fishing | Cooking | Learning | Brewing | Mining | Hunting | Camping.
 Fishing
You will find the NPC for fishing activity here : /navi midgard 33/400
In order to be able to fish, you will need to be in the water and you will need one of the five existing Baits.
- You can get them by talking to the NPC in the Fishing House in Midgard.
- This house is located at Midgard, west side of the donations' fountain at south.
→ Take note that it is one of the rare occasion to obtain Bloody Branches, you can get a limited number of Bloody Branches each day, depending of your Mastery !
→ Each 25 Mastery grants 1 Bloody Branches with a low chance upon fishing. Use @fishing to check your Mastery. Regardless of the mastery, you can get 2 Bloody Branch, meaning that if you have 66 Mastery, you will have : (66 / 25) + 2 = 4 Bloody Branches !
  By trading fishes for Fishing Points, you will be allowed to purchase items into the Shop.
  Read below to check the shop content.
| Dead Branch Box (10)
Price : 2 Fishing Points |
Elite Dead Branch
Price : 2 Fishing Points |
Elite Bloody Dead Branch
Price : 250 Fishing Points | ||
| North Fly Wing
Price : 12 Fishing Points |
Life Insurance
Price : 6 Fishing Points |
Premium Hay
Price : 12 Fishing Points | ||
| Old Violet Box
Price : 18 Fishing Points |
Growth Jellopy
Price : 12 Fishing Points |
Old Blue Box
Price : 6 Fishing Points | ||
| Perfect Unslot Tools
Price : 65 Fishing Points |
Seed Box
Price : 75 Fishing Points |
Nightmare Key
Price : 25 Fishing Points | ||
| Gem Box Lv 1
Price : 150 Fishing Points | ||||
Tides
- While Fishing, there is some sort of Happy Hours defined by tides. A NPC named Bobba, the Fish Meteo Expert, located in Midgard (38, 378) will be able to give you more informations about those phenomena.
- High tides offer an easier fishing session by reducing chances to get a Fresh Fish, Rotten Fish, or any other low grade item and it will be easier to get your Bloody Branches.
- Tides are mentionned by the NPC, however, take note that if the high tide occurred at 4 pm yesterday, it will be Happy Hour at 5 pm today and 6 pm tomorrow.
- High tides offer an easier fishing session by reducing chances to get a Fresh Fish, Rotten Fish, or any other low grade item and it will be easier to get your Bloody Branches.
Baits
| Types of Baits | ||||||||
|---|---|---|---|---|---|---|---|---|
| ID | Name | Success Rate Bonus | ID | Name | Success Rate Bonus | |||

|
6781 | Living Earthworm | 0% | 
|
6782 | Fresh Lobster | 10% | |
|
6778 | Squid | 20% | 
|
6903 | King Earthworm | 30% | |
|
6902 | King Shrimp | 40% | |||||
All types of Fishes
- On DaRO, fishes can be sorted into two categories.
- The first type is giving you points you can use to buy different type of Branches in the Fishing Shop.
- The other one contains fishes giving you effects upon use during a certain duration.
Fish tradable for Fishing Points
| List of Fishes giving Fishing Points | |||||||||||||
|---|---|---|---|---|---|---|---|---|---|---|---|---|---|
| ID | Name | Level | Health Points | Points | ID | Name | Level | Health Points | Points | ||||
| Day | Night | Day | Night | ||||||||||

|
6779 | Mackerel | 1 | 7 500 | 6 750 | 2 | 
|
6776 | Eel | 2 | 7 500 | 6 750 | 3 |
|
6774 | Piranha | 3 | 7 500 | 6 750 | 4 | 
|
6772 | Octopus | 4 | 10 000 | 9 000 | 5 |
|
6096 | Fish with Blue Back | 5 | 12 500 | 11 250 | 6 | 
|
6770 | Shark | 6 | 15 000 | 13 500 | 8 |

|
6899 | Giant Octopus | 7 | 17 500 | 15 750 | 12 | 
|
6900 | Giant Squid | 8 | 10 000 | 9 000 | 12 |

|
6898 | Whale | 9 | 35 000 | 31 500 | 20 | 
|
6897 | Blue Whale | 10 | 50 000 | 45 000 | 40 |
Fish giving special effects
| ID | Name | Level | HP (Day) | HP (Night) | Effects (Small) | Effects (Medium) | Effects (Big) | |
|---|---|---|---|---|---|---|---|---|
 |
8100 | Blue Fish | 1 | 10 000 | 9 000 |
|
|
|
 |
8101 | Marlin | 2 | 8 000 | 7 200 |
|
|
|
 |
8102 | Catfish | 3 | 12 000 | 10 800 |
|
|
|
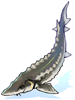 |
8103 | Sturgeon | 4 | 12 500 | 11 250 |
|
|
|
 |
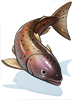
8104 | Golden Fish | 5 | 13 300 | 11 970 |
|
|
|
 |
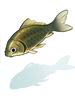
8105 | Salmon | 6 | 15 000 | 13 500 |
|
|
|
 |
8106 | Perch | 7 | 7 500 | 6 750 |
|
|
|
 |
8107 | Riversquire | 8 | 6 600 | 5 940 |
|
|
|
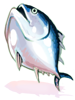 |
8108 | Tuna | 9 | 12 500 | 11 250 |
|
|
|
 |
8109 | Carp | 10 | 10 000 | 9 000 |
|
|
|
Where to fish ?
  Depending of the area you are currently fishing on, available fishes will vary.
  Please check the table below in order to check where to find the fish you aim for !
  Take note that their statistics will also vary depending on the map you are on.
- The bigger the number of the map is, the more chance you will have fishes giving Fishing Points instead of fishes giving effects.
- Your Fishing Mastery will also increase the chance to obtain a bigger fish.
- Meaning that you have more chance to get fishes giving points in prt_fild10 than prt_fild00.
- Elite Maps have doubled chance to not drop Fresh Fish / Rotten Fish or any other low grade item.
| Fishes locations | |||||||
|---|---|---|---|---|---|---|---|
| Map Name | Available Fishes | Map Name | Available Fishes | Map Name | Available Fishes | ||
| prt_fild |
|
gef_fild |
|
pay_fild |
| ||
| moc_fild |
|
cmd_fild |
|
um_fild |
| ||
| mjolnir_fild |
|
yuno_fild |
|
hu_fild |
| ||
| ein_fild |
|
lhz_fild |
|
ra_fild |
| ||
| ve_fild |
|
man_fild |
|
spl_fild |
| ||
| bif_fild |
|
ecl_fild |
|
dic_fild |
| ||
| mid_fild |
|
myr_fild |
|
jot_fild |
| ||
| al_fild |
|
wel_fild |
|
fay_fild |
| ||
| casp_fild |
|
asg_fild |
|
eden_fild |
| ||
| pan_fild |
|
mus_fild |
|
||||
Fights System
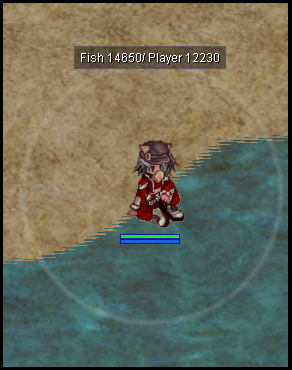
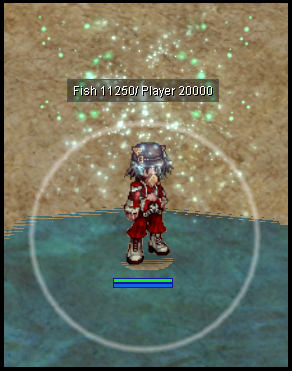
Each time you fish, your Fishing Line has Health Points, and so it goes for all fishes as well. The higher your fishing mastery is, the higher the HPs of your Line will be.
But... How do you fish ?
That's simple ! You will need to pay attention to your character's emotes of course ! By typing @fishing or by casting the Fishing Skill while having your feet in an area full of water, your character will start to fish. The character will be forcibly sat and after a while, you will see an emote above the head of the character.
- Two emotes can be seen while fishing :
- The first one, a firework effect will be showned, meaning there is a chance to catch the fish, you will have to stand up.
- The second one is a classic bubble around your character. If this emote is showned, it means the fish is cautious and that it's not the good time for you to try to catch it, better stay sat !
What you need to do is to stand up at the right time. To stand up, you can press Inser key on your keyboard or just type /sit in your chat.
  If you succeed, the fish will take damage equal to half of your fishing mastery.
  If you failed, your fishing line will take damage equal to half of its toughness.
You will need to repeat the maneuvers as long as your line or the fish's HPs have not hit rock bottom.
- If you catch it, there is :
- 40 + Fishing Level x 0.2% chance to obtain the fish you fought against
- If the previous formula isn't a success, you will have a second chance to get the same type of fish than the one you fought against, but in smaller size.
- Take note that if you loose despite these tries, you will receive a Rotten Fish. This one can be exchanged for QPets Food just by dismantling it to the Pet Breeder !
  You will earn Fishing Experience even if you fail your catch.
  Upon a successful try, you will be granted with 10 x Fish Level Experience Points.
  Else, you will receive 3 x Fish Level Experience Points.
  You can check the level of the Fish in the table overhead.
 Cooking
You will find the NPC for cooking activity here : /navi midgard 317/165
  Each level of Cooking learned unlock one Food level that can be crafted.
  If you master Cooking Level 10, you will be able to craft usual Level 10 Food or Foods that do not disappear upon death.
Cooking Book
- You can obtain all books required to cook to the Book Seller located near the Mining NPC in Midgard [/navi Midgard (177, 133)].
- This NPC only accept Bronze Coins, she is greedy, don't let her take your savings!
- Cooking Books will help you to cast faster the food you are creating and it will also increase your success rate if the book corresponds to the created brew.
- This NPC only accept Bronze Coins, she is greedy, don't let her take your savings!
Cooking Kits
| ID | Name | Success Rate bonus | ID | Name | Success Rate bonus | ||
|---|---|---|---|---|---|---|---|

|
12125 | Outdoor Cooking Kit | 0% | 
|
12126 | Home Cooking Kit | 10% |

|
12127 | Professional Cooking Kit | 20% | 
|
12128 | Royal Cooking Kit | 30% |
|
12129 | Fantastic Cooking Kit | 100% |
Success Rates
| Cooking formulas | |
|---|---|
| Chances to get one Food | [(40 + CookingMastery * 0.5) - (5 * FoodLevel)]%
|
| Chances to get a second Food | [Chances to get one Food / 3] - 10%
|
| Chances to get a third Food | [Chances to get one Food / 5] - 20%
|
Rewards
- Each cooking success will grant the player by 50 experience point per ActivityLevel learned.
- Upon a cooking failure, you will only be granted by a third of this amount of experience.
We kept the same foods effect and crafting materials as official, you can check a complete list of them by clicking here !
 Learning
You will find the NPC for learning activity here : /navi midgard 363/271
The Learning activity is used in order to increase experience points earned.
- By talking to some Posts NPC, you will start "learning".
The first NPC you can talk with is situated in Karakass Town, precisely at kar_bib,172,113.
How it works ?
When you talk to any of these NPC located in almost all libraries, you will have to choose between two different studies.
- The first one requires to stay in the area. You won't be allowed to change map to accumulate knowledges. Whenever you want, talk to the NPC to end your study. Each study have a maximum duration of 30 minutes.
- If you studied for 30 minutes, you will receive 50% more experience points upon monsters' kills as long as you don't reach the amount of experience points listed in the table below.
- The amount of Learning Experience points earned is equal to the time spent to learn in minutes. Meaning that if you studied for 30 minutes, you will be granted by 30 Learning Experience points.
- The second type of studies allow you to learn more about a specific monster.
- By accumulate knowledges about a monster, you will get more damage and resistance to this monster's ID. This bonus is fixed: 15% more damage dealt to this monster and 15% less damage received from it. Any study concerning a monster takes 30 seconds. After that, the bonus will be applied for an unlimited amount of time.
- If you want to start another study, the previous bonus will be erased.
Regardless of the type of studies you do, if you log out or change map, the current study will be cancelled.
The player can't learn more than 30 minutes each day. This cap is reset at midnight, please use @time to check current server time.
- The experience points' pool generated by this system may be complicated. If you want more infos, please check the explanations below :
- If you studied enough to accumulate 11 500 boosted EXP and you kill a monster giving 400 Exp points, you will receive 600 Exp (400 +50%) and your Learning Pool will be reduced by 200. Your new pool will reach 11 300.
You cannot have several pool at a time. If you already have any and that you start another study, only the biggest pool will be conserved.
Libraries' locations
A list of available libraries are mentionned in the table below. It all depends of your learning level. You can't read books belonging to high level libraries if you lack experience !
Take note that all libraries are identical if these one are categorized in the same Activity Level requirement.
| Area | Activity Level required | Monsters Level concerned |
|---|---|---|
| Karakass' Center Place | 1 | 1~6 |
| Prontera East | 1 | 5~10 |
| Payon's Imperial Archives | 2 | 10~15 |
| Prontera West | 2 | 15~20 |
| Aldebaran's Alchemists' Library | 3 | 20~25 |
| Louyang's Poets' Library | 3 | 25~30 |
| Amatsu's Lost Parchment | 4 | 30~35 |
| Yuno's Central Library | 5 | 35~40 |
| Lighthalzen's Thoughts | 6 | 40~45 |
| Hugel's Brothel | 6 | 45~50 |
| Yuno's Government Office | 7 | 50~55 |
| Louyang's Royal Writings | 7 | 55~60 |
| Izlude's Academy | 8 | 60~65 |
| Veins' Desert Pearls | 8 | 65~70 |
| Splendide's Secrets | 8 | 70~75 |
| El Discastes' Office | 8 | 75~80 |
| Kugans' Factory | 8 | 80~85 |
| Midgard's Academy Archives | 8 | 85~90 |
| Hylo's Library | 9 | 90~95 |
| Alexandria's Inn | 9 | 95~100 |
| Hlesey's Rest Area | 9 | 100~105 |
| Caspen's Old Castle | 10 | 105~110 |
| Eden's House | 10 | 110~115 |
 Brewing
You will find the NPC for brewing activity here : /navi midgard 78/192
- Brews are sorted in 3 categories : Mixtures, Solutions & Infusions.
- Each level of Brewing will unlock one recipe of each category.
Brewing Book
- You can obtain all books required to brew to the Book Seller located near the Mining NPC in Midgard [/navi Midgard (177, 133)].
- This NPC only accept Bronze Coins, she is greedy, don't let her take your savings!
- Brewing Books will help you to cast faster the food you are creating and it will also increase your success rate if the book corresponds to the created brew.
- This NPC only accept Bronze Coins, she is greedy, don't let her take your savings!
Brewing Kits
- You can get Brewing Kits by killing monsters usually giving Cooking Kits. Use @whodrops command to check it out!
- Outdoor Brewing Kits & Home Brewing Kits are only sold by the Brewing Master NPC in Midgard.
| ID | Name | Success Rate bonus | ID | Name | Success Rate bonus | ||
|---|---|---|---|---|---|---|---|

|
8191 | Outdoor Brewing Kit | 0% | 
|
8192 | Home Brewing Kit | 10% |
|
8193 | Professional Brewing Kit | 20% | 
|
8194 | Royal Brewing Kit | 30% |

|
8195 | Fantastic Brewing Kit | 100% |
Success Rates
| Brewing formulas | |
|---|---|
| Chances to get one Brew | (40 + BrewingMastery * 0.2)%
|
| Chances to get a second Brew | [Chances to get one Brew / 3] - 10%
|
| Chances to get a third Brew | [Chances to get one Brew / 5] - 20%
|
Mixtures
| ID | Name | Effects | Materials | Mixture Level | |
|---|---|---|---|---|---|
|
8130 | Apple Mixture |
|
|
1 |
|
8131 | Banana Mixture |
|
|
2 |

|
8132 | Bloody Mixture |
|
|
3 |
|
8133 | Carrot Mixture |
|
|
4 |

|
8134 | Choco Mixture |
|
|
5 |

|
8135 | Grape Mixture |
|
|
6 |

|
8136 | Tonic Mixture |
|
|
7 |

|
8137 | Mastela Mixture |
|
|
8 |

|
8138 | Mora Mixture |
|
|
9 |

|
8139 | Ale Mixture |
|
|
10 |
Solutions
| ID | Name | Effects | Materials | Solution Level | |
|---|---|---|---|---|---|

|
8140 | Ocean Solution |
|
|
1 |

|
8141 | Golden Solution |
|
|
2 |

|
8142 | Azur Solution |
|
|
3 |

|
8143 | Brown Solution |
|
|
4 |

|
8144 | Scarlet Solution |
|
|
5 |
|
8145 | Miracle Solution |
|
|
6 |

|
8146 | Mana Solution |
|
|
7 |

|
8147 | Mega Solution |
|
|
8 |

|
8148 | Blue Solution |
|
|
9 |

|
8149 | Red Solution |
|
|
10 |
Infusions
| ID | Name | Effects | Materials | Solution Level | |
|---|---|---|---|---|---|

|
8170 | Green Infusion |
|
|
1 |
|
8171 | Red Infusion |
|
|
2 |
|
8172 | Blue Infusion |
|
|
3 |
|
8173 | Yellow Infusion |
|
|
4 |

|
8174 | Brown Infusion |
|
|
5 |

|
8175 | Bloody Infusion |
|
|
6 |

|
8176 | Golden Infusion |
|
|
7 |

|
8177 | Silver Infusion |
|
|
8 |
|
8178 | Violet Infusion |
|
|
9 |
|
8179 | White Infusion |
|
|
10 |
 Mining
You will find the NPC for mining activity here : /navi midgard 165/122
You can mine as long as you learnt the Mining skill at level 1 or higher. It's like a passive skill and you will be able to collect items and mining experience upon killing a mine.
- Mines are located on fields or dungeons and are very weak, you just need to defeat them to get the rewards.
Check the list below in order to know which mine you may want to hunt !
The command @locate will give the player a chance to create a personal mine after a 10 sec cast. This command works on every map already containing a mine and will spawn a mine for 30 minutes according to the map's mine level. This command can be launched once per day per eligible map.
Success rate :
[30 + 10 * (Mining activity's level - Mine's level) - 10 * (number of attempts today)]%. Maximum value is 100% and can reach 0% if too many attempts are done.
  Upon a kill, you will get Mining Experience according to this formula : Mining Level OR Mine Level x 50.
  The lowest value will be used to calculate the points granted.
Lvl 1 Mines
| Mine | Mine Lvl | Common Drops | Rare Drops | |
|---|---|---|---|---|
 |
Coal Mine | 1 |
|
|
 |
Stone Mine | 1 |
|
|
Lvl 2 Mines
| Mine | Mine Lvl | Common Drops | Rare Drops | |
|---|---|---|---|---|
| Iron Mine | 2 |
|
| |
 |
Phracon Mine | 2 |
|
|
Lvl 3 Mines
| Mine | Mine Lvl | Common Drops | Rare Drops | |
|---|---|---|---|---|
 |
Elemental Mine | 3 |
|
|
 |
Emvertacon Mine | 3 |
|
|
|
Brigan Mine | 3 |
|
|
Lvl 4 Mines
| Mine | Mine Lvl | Common Drops | Rare Drops | |
|---|---|---|---|---|
| Ruby Mine | 4 |
|
| |
|
Sapphire Mine | 4 |
|
|
 |
Emerald Mine | 4 |
|
|
| Topaz Mine | 4 |
|
| |
|
Star Mine | 4 |
|
|
Lvl 5 Mines
| Mine | Mine Lvl | Common Drops | Rare Drops | |
|---|---|---|---|---|
 |
Mystic Mine | 5 |
|
|
| Crystal Mine | 5 |
|
| |
|
Silver Mine | 5 |
|
|
 |
Shining Mine | 5 |
|
|
Lvl 6 Mines
| Mine | Mine Lvl | Common Drops | Rare Drops | |
|---|---|---|---|---|
|
Oridecon Mine | 6 |
|
|
|
Elunium Mine | 6 |
|
|
|
Gold Mine | 6 |
|
|
Lvl 7 Mines
| Mine | Mine Lvl | Common Drops | Rare Drops | |
|---|---|---|---|---|
|
Emperium Mine | 7 |
|
|
|
Gem Mine | 7 |
|
|
|
Darkness Mine | 7 |
|
|
|
Biotite Mine | 7 |
|
|
 |
Muscovite Mine | 7 |
|
|
| Phlogopite Mine | 7 |
|
|
Lvl 8 Mines
| Mine | Mine Lvl | Common Drops | Rare Drops | |
|---|---|---|---|---|
|
Bradium Mine | 8 |
|
Specific Items used to create Lvl 5 Weapons |
|
Carnium Mine | 8 |
|
Specific Items used to create Lvl 5 Weapons |
|
Illusion Mine | 8 |
|
Specific Items used to create Lvl 5 Weapons |
|
Quartz Mine | 8 |
|
Specific Items used to create Lvl 5 Weapons |
Lvl 9 Mines
| Mine | Mine Lvl | Common Drops | Rare Drops | |
|---|---|---|---|---|
|
Rich Oridecon Mine | 9 |
|
|
|
Rich Elunium Mine | 9 |
|
|
| Rainbow Mine | 9 |
|
|
Lvl 10 Mines
| Mine | Mine Lvl | Common Drops | Rare Drops | |
|---|---|---|---|---|
|
Rich Bradium Mine | 10 |
|
|
|
Rich Carnium Mine | 10 |
|
|
Lvl 11 Mines
| Mine | Mine Lvl | Common Drops | Rare Drops | |
|---|---|---|---|---|
|
Mithril Mine | 11 |
|
|
|
Muspellium Mine | 11 |
|
|
Lvl 12 Mines
| Mine | Mine Lvl | Common Drops | Rare Drops | |
|---|---|---|---|---|
 |
Orichalcum Mine | 12 |
|
|
 Hunting
You will find the NPC for hunting activity here : /navi midgard 249/135
Each day, any player can take part to this activity 3 times per day. When you type @hunting or at the moment you use the Hunting skill, you will have to choose a level threshold concerning your future target.
- Take note that your mastery will lower the number of kills required !
| Hunting | |
|---|---|
| Hunting Level | Level Threshold |
| 1 | 1~10 |
| 2 | 11~20 |
| 3 | 21~30 |
| 4 | 31~40 |
| 5 | 41~50 |
| 6 | 51~60 |
| 7 | 61~70 |
| 8 | 71~80 |
| 9 | 81~90 |
| 10 | 91~100 |
| 11 (needs Hunting Level 10) | 100+ |
  The level threshold used is a specific level that isn't always the same than the one you can see by typing @mi.
  This system guarantees a level closer to the monster's real power.
You can reset the chosen target 3 times per day in order to be granted with another target.
- If any team member kill a monster on the same map than the one you are on, it will count for your Hunting quest.
Daily reset occurs at midnight server time, use @time to check the current server time.
- Upon quest completion, you can use Hunting skill again no matter the area you are in, in order to give back the quest and receive the Hunting Points and Hunting Experience points you deserve.
- Hunting Points granted are equal to (Mastery / 10 + 10 + Level of the Hunt x Level of the Hunt).
- Hunting Experience points granted are equal to 100 x Level of the Hunt.
You need to equip the Hunting Tool when you pick the quest and when you give it back in order to receive the maximum amount of Hunting Points.
- In Midgard's south-west district near the market, you can meet the Hunting Shop handler, he will gladly exchange your Hunting Points versus any reward of the list below.
| Bronze Coin
Price : 25 Hunting Points |
Old Card Shard
Price : 50 Hunting Points |
| Aged Card Shard
Price : 150 Hunting Points |
Stuff Box Lv 1
Price : 100 Hunting Points |
| Stuff Box Lv 2
Price : 450 Hunting Points |
Stuff Box Lv 3
Price : 1 000 Hunting Points |
| Stuff Box Lv 4
Price : 2 500 Hunting Points |
Stuff Box Lv 5
Price : 4 000 Hunting Points |
 Camping
This activity allows the use of the command @rest. The NPC giving the activity is the Camping Master at midgard,150,378.
- This command will force the player to sit for 3 sec. If the player moves or fights, the command is cancelled (you cannot rest while in combat).
- The buff will last for 100 sec + 10 sec per Camping level.
- The rest gives Increase Agility and Blessing level 10. It also regen [BaseLv * KuganLv * 0.05 * CampingLv * (10 + Tool Refine)]/10.
- After a rest, Camping will also grant the bonus buff you configured with the Camping Master (Configure Bonus Buff, or @camping) among the buffs unlocked by your Camping level, see the table below.
- From Camping level 11, you can configure a second bonus buff, different from the first one.
Upon a rest, you will get Camping Experience according to this formula : 200 * (time since last rest, max 600 sec / 600) * (average % of missing HP and SP / 100).
| Camping Level | Bonus buffs you can choose |
|---|---|
| 1 | Magnificat Lv5 |
| 3 | Angelus Lv10, Gloria Lv5 |
| 5 | Fire Weapon Lv5, Water Weapon Lv5, Wind Weapon Lv5, Earth Weapon Lv5, Aspersio (Holy) Lv5, Enchant Poison Lv10 |
| 7 | Weapon Protection Lv5, Shield Protection Lv5, Armor Protection Lv5, Helm Protection Lv5 |
| 9 | Assumptio Lv5, Fortune's Kiss Lv10, Humming Lv10, Whistle Lv10, Assassin Cross of Sunset Lv1, Poem of Bragi Lv3, Apple of Idunn Lv1, Service for You Lv1 |
| 11 | A second bonus buff (different from the first one) is given. |