
 Essentials
Introduction
DARO has its own game interface. It is drawn by the DARO client (daro.dll), on top of the normal Ragnarok windows. It puts what you use most on screen: your character, your bars, your shortcuts, your quests and big round buttons. Many NPCs now open a real window instead of a long text menu.
This page shows each part of the screen and what each button does. Pictures marked Preview are design pictures: the game can look a bit different (colours follow your interface skin).
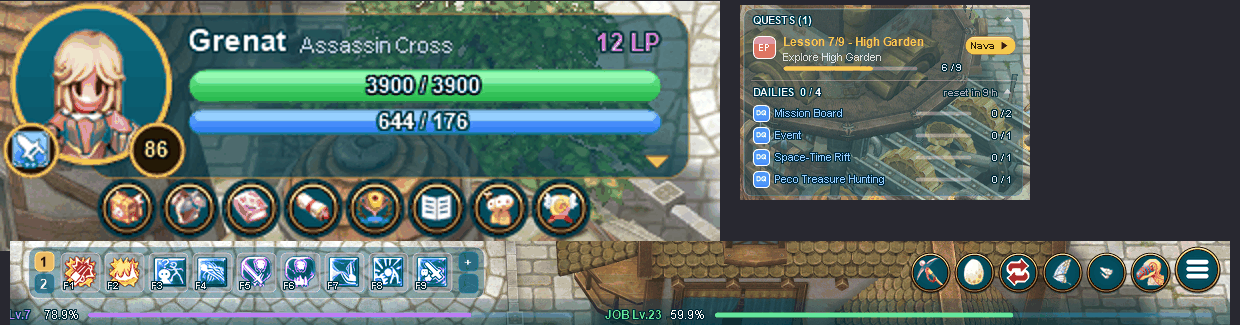
Preview: the character frame (top left), the quest tracker, the shortcut bar and the quick buttons.
Character frame
Top left: your portrait, name, job, level, LP, HP and SP, and 8 round buttons.
Quick buttons
Bottom right: Activities, Qpets, Equipment swap, Return,  Fly Wing, Mount and the Menu.
Shortcut bar
Bottom centre: F1 to F9, 2 sets, up to 4 rows.
Quest tracker
Right side: your quests and the 4 dailies, with a Nava button.
Mount mode
On your mount, the frame and the bar show your mount, with 4 round mount skill buttons.
Windows
CODEX, Dressing, Stylist, Stable, My Pet... one window per system.
The character frame
The frame at the top left of the screen replaces the old Basic Info window.
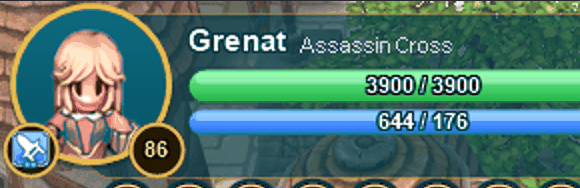
Preview: the character frame and its row of round buttons.
- Portrait: your character, with your own hairstyle and hair colour. Click it to open the CHARACTER window.
- Level badge: your Base Level, at the bottom right of the portrait. Your job icon is at the bottom left.
- Name and job on the first line, and your LP at the end of it (for example "30 LP").
- HP bar (green) and SP bar (blue), with the numbers written inside.
- Arrow at the bottom right: opens the full frame (see below).
The 8 round buttons
Under the frame, 8 small round buttons open your main windows. Move the mouse over a button to see its name and its key. A button glows orange while its window is open: click it again to close the window.
 Inventory Alt+E: your bag.
 Equipment Alt+Q: the game equipment window.
 Skills Alt+S: your skill tree.
 Quests Alt+U: the QUESTS window: story, dailies, quests, events.
 Achievements: your achievements.
 Codex: the CODEX, the encyclopedia of the game.
 Party Alt+Z: your party.
 Guild Alt+G: your guild.
The full frame
Click the small arrow of the frame (or leave the mouse over it) to see more:
- Base, Job and Kugan levels, each with a thin EXP bar and its %.
- Weight (bar and %) and your Zeny.
- Your Astral sign and your number of Reborns.
- Level-up pills: after you gain Status Points, Skill Points or Kugan Points, a gold pill appears. Click it to open the CHARACTER window, the skill tree or the KUGANS window. It goes away once clicked.
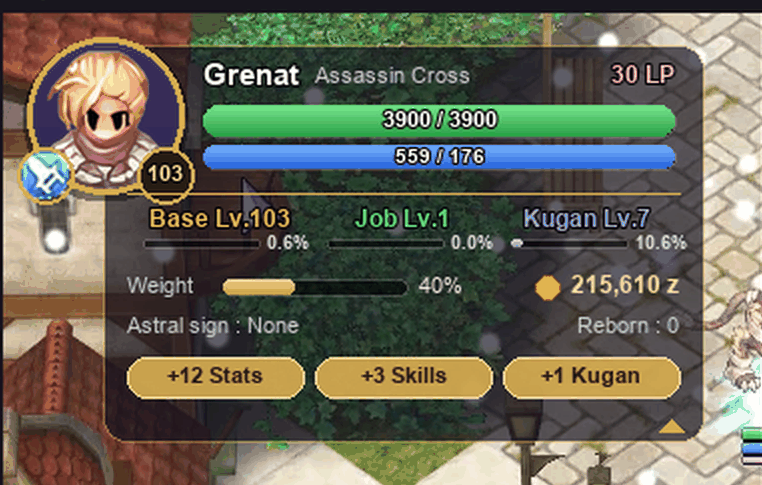
Preview: the full frame. In the game the pills now say "Level up!", "Job level up!" or "Kugan level up!".
The quick buttons
A row of big round buttons sits at the bottom right, above the EXP bar. Some open a list when you move the mouse over them: the list unrolls upwards and stays open while the mouse is on it.
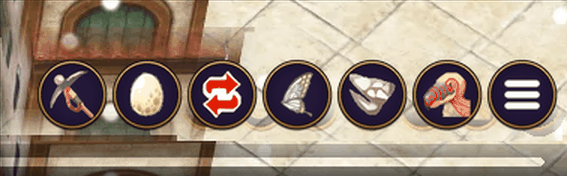
The quick buttons, from left to right (validated design).
 Activities: mouse over: your activity skills (Fishing, Cooking, Learning, Brewing, Mining, Hunting, Camping) as you learn them, click one to use it. Click the button: the ACTIVITIES window.
 Qpets: mouse over: the Qpets of your inventory. Click one to call it or put it away.
 Equipment swap: changes your whole set of gear at once (the game Equip Switch).
 Return: mouse over: Return to Midgard, your save point and your 3 memos (below).
 Fly Wing: uses a Fly Wing from your inventory. Key T by default.
 Mount: gets on or off your mount. Key M by default.
 Menu: mouse over: the Menu panel with all the windows (below).
Return: Midgard, save point and memos
The Return button uses your Return to Midgard skill. Move the mouse over it: one line appears for each level of the skill you know. Click a line to cast it.
 Return to Midgard: Level 1: back to Midgard.
 Return to save (your save map, for example mid_in01): Level 2: back to your save point.
 Memo 1 (its map): Level 3: to the place saved in Memo 1.
- Memo 2 (its map): Level 4: to the place saved in Memo 2.
- Memo 3 (its map): Level 5: to the place saved in Memo 3.
A Memo line has a small pin button on its right: Save my position as Memo 1 (2, 3). Click it to save the place where you stand. Some maps do not allow memos.
The Menu panel
Move the mouse over the Menu button (the last one): a panel with 4 rows of round buttons opens above it.
Character
 Status
- Equipment
- Inventory
- Skills
 Kugans
Adventure
- Quests
 Instances
 Navigation
- Achievements
- Codex
Social
- Party
- Guild
 Mail
 Bank
 Replay
System
 Settings
 Graphics
 Shortcuts
 Change character
 Quit
The shortcut bar
The shortcut bar is at the bottom centre of the screen. It is the same bar as before (your skills and items stay in place), drawn bigger.
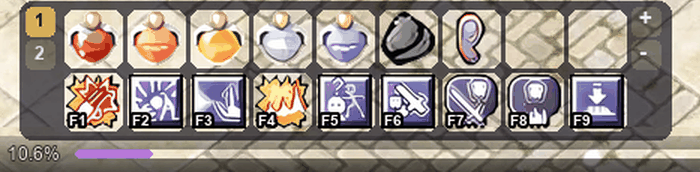
Preview: the shortcut bar with 2 rows open.
- 9 slots per row, keys F1 to F9. Item slots show how many you have; a skill or item that is waiting shows a dark veil.
- 1 / 2 on the left: switch between your 2 sets of shortcuts.
- + / - on the right: show more rows (up to 4) or fewer.
- Drag a skill or an item onto a slot to place it. Right-click a slot to read its description.
- Move the bar: drag it by its background. Double-click the background to put it back in its place.
With WASD movement on (see Options), the keys 1 to 9 use the slots of row 2.
The quest tracker
The tracker sits on the right side of the screen, under the minimap. It is light and see-through, so it does not get in your way.
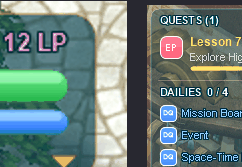
Preview: the QUESTS and DAILIES sections.
- QUESTS (n): the quests you follow. Your story step is pinned at the top. A badge shows the kind of quest: EP for the story, DQ for dailies, NQ and EV for other quests and events.
- Each line shows the progress (for example 2 / 8). Hunting quests show one line per monster, with its count. Click a monster or item name to open its sheet in the CODEX.
- Nava button: click it (or the line) and Nava shows you the way to the goal.
- DAILIES 0 / 4: the 4 dailies, with the time left before they reset ("reset in 22 h"). Mission Board needs 2, the others 1.
- Click a section title to fold it. Drag a section title to move the tracker: its place is saved.
- Mission Board 0 / 2
- Event 0 / 1
- Space-Time Rift 0 / 1
- Peco Treasure Hunting 0 / 1
The full list of your quests is in the Quests window (round button under the frame, Alt+U).
Mount mode
When you ride your mount, the interface changes: the frame, the bars and the shortcut bar show your mount. See the Mount System guide to get a mount.
The mount frame
- The top left frame shows your mount instead of you: its portrait, its name and a paw badge in place of your job icon.
- The bars are the mount's: HP in orange and SP in yellow. Your LP stay on the name line.
- The frame and the bar get a leather saddle look, with a paw print in each slot.
- The gauge under your character shows the mount's HP and SP too, with a paw at each end.
- You name your mount during the tutorial. You can rename it at the Mount Breeder (The Stable window).
Party members and the battleground always see your own HP, not your mount's.
Mount skill buttons and saddle bar
While riding, 4 round buttons appear above your shortcut bar. Click one, or press 1, 2, 3 or 4 (when the chat line is empty). Your own shortcut bar stays the same.
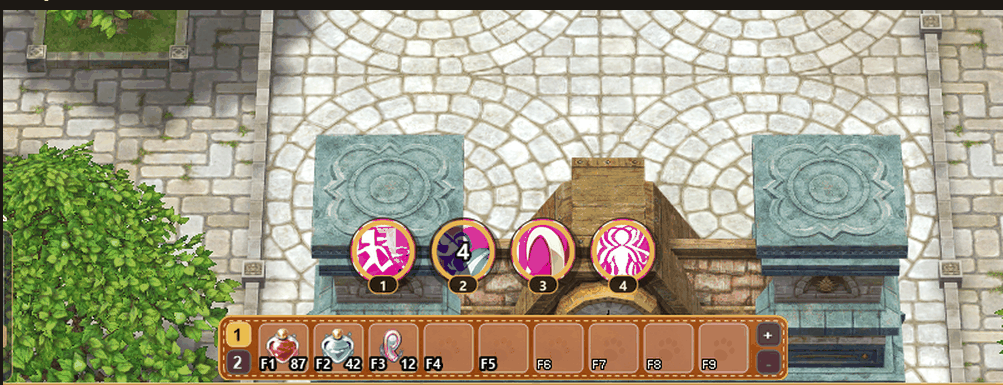
The 4 mount skill buttons above the saddle bar (validated design).
 Mount Acceleration 1: walks faster for 10 seconds, 10 mount SP.
 Mount Run 2: runs straight ahead for 3 seconds, 5 mount SP.
 Mount Jump 3: jumps over obstacles, 10 mount SP.
 Mount Backside 4: moves you backwards, 5 mount SP.
The mount skills have no cooldown: they only cost the mount's SP. You can turn the round buttons off in Options > Controls ("Mount skill buttons"). Then the old saddle bar puts the 4 mount skills on F1 to F4 and a Fly Wing on F5.
Attacking while riding makes you get off your mount first.
Mount portraits
The portrait of your mount depends on your job.
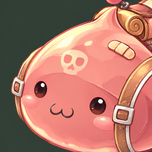 Poring: Novice, Super Novice, Taekwon, Star Gladiator
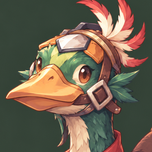 Peco: Swordman, Gunslinger
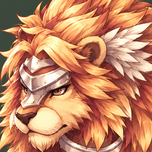 Lion: Knight, Crusader and their next jobs
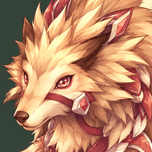 Fox: Mage, Wizard, Sage and their next jobs
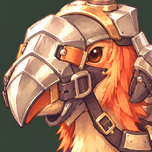 Ostrich: Archer, Hunter, Bard, Dancer and their next jobs
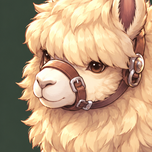 Alpaca: Acolyte, Priest, Monk and their next jobs
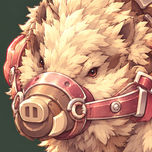 Boar: Merchant, Blacksmith, Alchemist and their next jobs
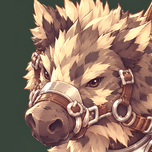 Cerberus: Thief, Assassin, Rogue and their next jobs
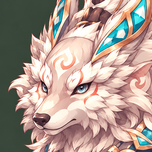 Haetae: Star Emperor, Soul Reaper
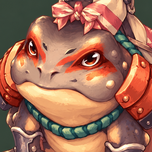 Toad: Ninja, Soul Linker
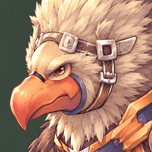 Griffin: Royal Guard
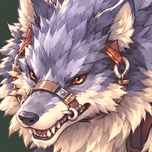 Wolf: Ranger
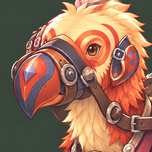 Bird: Rebellion
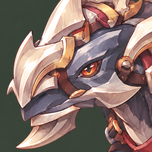 Mechanical dragon: Dragon Knight
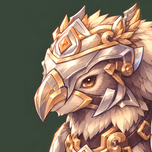 Mechanical griffin: Imperial Guard
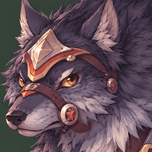 Armoured wolf: Windhawk
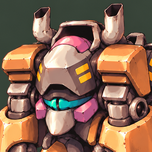 Madogear: Mechanic in a Madogear
Madogear
In a Madogear, the frame turns to metal: a gear badge, a Madogear portrait and a steel grey HP bar. There is no saddle bar and no mount buttons in a Madogear.
MVP fights
The MVP bar
When an MVP is within 20 cells of you, a big bar appears at the top of the screen.

Preview: the first design of the MVP bar. The game now also shows the Elite tag and the element, race and size icons.
- A gold medallion with a crown, then the MVP's name.
- The line under the name: MVP - Lv. 141 - Phase 1 / 4. An Elite MVP has Elite in violet in front of it.
- Then the element level and element icon, the race icon and the size icon.
- The HP bar has 4 layers, one per phase. The % is written in the middle and the exact HP under it (for example 5,024,701 / 5,024,701). Damage just taken shows in light beige for a moment.
- x4 on the right: the layers left, the current one included.
- Under the bar: the MVP's debuffs on the left and its buffs on the right.
With 2 MVPs near you, 2 bars are stacked. With 3 or more, there is no bar at the top.
Name plates
Move the mouse over a monster (or target it) to see its plate: Lv.141 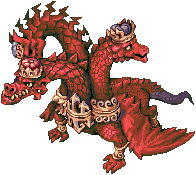 Ignis, with the element, race and size icons in front. Bosses, MVPs and elites have a gold symbol (a crown for an MVP) and their rank under the name, like Elite MVP or Elite Boss (Elite in violet). The HP bar is under the monster's feet once it is hurt.
You can turn the element, race and size icons on or off in Options > Display ("Monster element, race and size"). The HP bar size and its segments are there too.
Precast: get out of the area
Big MVPs (Super MVPs, World MVPs) can cast a huge skill while they keep moving. Before it hits, the game shows the area on the ground where it will land, and the MVP shouts the name of the skill ("Concentration !!", "Strip Armor !!", "Ignis : The end is near !"). A banner at the top shows the skill name and the time left.
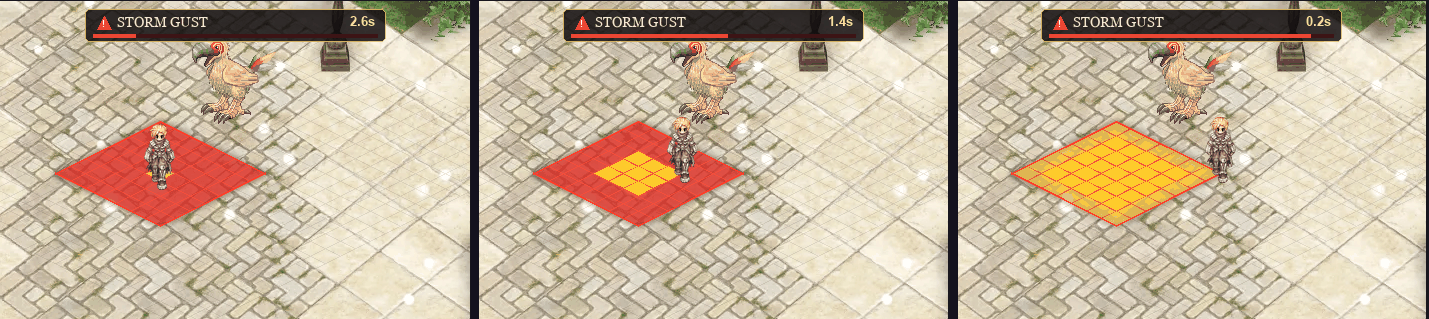
Preview: the area is red, yellow fills it from the centre; when it is full, the skill lands.
- The area is red. Yellow fills it from the centre to the edge: when it is full, the skill falls.
- A skill with several impacts (like Meteor Storm) shows one area per impact, with its order number. Each area stays until its own impact.
- Leave the area before it is full. Only the cells still marked at the impact are hit.
- If the cast stops, the area disappears.
More about these spells: Freecasted spells.
The CHARACTER window
Click your portrait, or use Menu > Character > Status (Alt+A), to open the CHARACTER window. It replaces the old Status and Equipment windows on one page.
- Three tabs at the top: General, Special and Title.
- General: your equipment slots around your character: Upper, Middle and Lower Headgear, Armor, Weapon, Shield, Garment, Shoes, Accessory 1 and 2. Move the mouse over a slot to see the item, its refine and its cards.
- Special: Costume Upper, Middle and Lower, Back, Pet, Pendant and 2 Charms.
- Title: pick one of the titles you unlocked.
- A Dressing button under your character opens the Dressing.
- Show equipment to others: a switch, so other players can see your gear or not.
- Equipment swap: changes your whole set of gear at once, like the round quick button.
Under the equipment, the stats grid. The badge at the top shows your Status Points.
| Stat | Value, bonus, cost | Shown on its line |
|---|---|---|
| STR | value + bonus, cost, + | Atk and Def |
| AGI | value + bonus, cost, + | Matk and Mdef |
| VIT | value + bonus, cost, + | Hit and Flee |
| INT | value + bonus, cost, + | Critical and Aspd |
| DEX | value + bonus, cost, + | Crit Damage |
| LUK | value + bonus, cost, + | Move Speed |
The cost is the number of Status Points the next point needs. The green + button is lit when you have enough points and the stat is below its maximum.
Under the stats, the same page shows your Reputation and your Bonuses.
The Dressing
The Dressing holds the costumes and pet looks of your account. Click one to wear it, anywhere and for free. Open it with the Dressing button of the CHARACTER window, or with @hat and @pet.
- Filters at the top: All, Top, Mid, Lower, Garment, Effect, Pets and Aura.
- A collection grid of your costumes, with pages. Click: wear it or take it off. Right-click: more (wear, see it in the CODEX, delete it).
- A preview of your character with Turn buttons, and the look of each slot: the original look, the costume, the effect and the aura.
- Take off all costumes: back to your original look in one click.
- + Add from my inventory: tick items of your bag to turn them into costumes, several at once. Pets can go in, not eggs. A costume already in your Dressing cannot be added twice. The item is used up: it does not come back to your inventory.
- +5 Max HP for each costume or pet look you store, on all your characters.
- 300 costumes in the Collection ("Collection: 4 / 300").
- 400 pet looks ("Pet looks: n / 400").
To buy new looks, see the Stylist in Styling your character.
The CODEX
The CODEX is the encyclopedia of the game: "The encyclopedia of Midgard". Open it with the round Codex button under the frame, or with Menu > Adventure > Codex.
CODEX - The encyclopedia of Midgard
Bestiary
- Monsters
- Bosses
- MVPs
- Super MVPs
- World MVPs
- Elite Monsters
- Elite Bosses
- QPets
Items
- Cards
- Equipments
- Usables
- Etc.
Help
- Commands
- A search box at the top: type part of a monster, item or command name.
- Buttons: Game guides (opens the guides of this website), MVP Board and Rankings.
- Home page cards: Explore the bestiary, Find an item, Game guides and Commands.
- A monster sheet shows its stats, card, loot and where it lives, and your kills (solo and in a party). An item sheet shows its effects, stats and where to get it.
Options (MENU window)
Open Menu > System > Settings. The MENU window lists your options in tabs. Each row has an On / Off switch or a row of choice pills. Your choices are saved on your account.
Windows instead of NPC menus
Many DARO NPCs and commands now open a window instead of a text menu. Each card below gives the window name, what it does, and the guide to read.
CODEX
The encyclopedia: monsters, items, commands, guides, MVP Board and rankings.
Opens: Codex button, Menu
KUGANS
Spend your Kugan Points: one row per Kugan skill, its level and a + button.
Opens: Menu > Character
Quick Access
A map of Midgard: click a district medallion to travel there.
Opens: Quick Access NPC, Midgard
Valkyrie
The warper: towns, fields and dungeons with a picture of each map.
Opens: Warper NPC
Stylist
Hairstyle, hair colour, clothes, body style, skin colour, auras, effects and costumes.
Opens: Stylist NPC
Dressing
Your account costumes and pet looks: click to wear them, anywhere, for free.
Opens: CHARACTER, @hat, @pet
Witch Nefasta
Create hats, dismantle them into fragments, open hat boxes and try them on.
Opens: Hat Witch Nefasta
Georgette's Workshop
Take the cards and gems out of your equipment.
Opens: Granny Georgette
The Stable
Your mount: tricks, reins, food, rename and the mount shop.
Opens: Mount Breeder, Midgard
My Pet
Your pet: hunger, intimacy, bonuses, evolution tree.
Opens: Right-click your pet
Restock
Named lists of what to keep in your bag, filled from your storage.
Opens: Kafra, @restock
Card Album
Your account card binder, the Collection and the Trial Master decks.
Opens: @album
Card Exchange
Cards to shards, shards to albums, a card to its elite card.
Opens: Magika, Elite Card Smith
Events
The automated events of the week, join them, your wins.
Opens: Event Manager, @events
Inscriptions of Babel
Write, empower, transfer or erase the inscription of a weapon.
Opens: Gabriel
Trial of Babel
Choose the mode, difficulty and races, see the records, enter the Tower.
Opens: Uriel
INSTANCES
All instances by category, their level, cost and rewards.
Opens: Menu > Adventure
Fish Journal
Fishing HUD on your character (line, fish, catch) and the journal of your fish.
Opens: Fishing
Peco Peco Race
Race ranking under the minimap, round bonus button and item box.
Opens: Peco Peco Race